

If your windows are looking a little foggy and your screens are collecting more dust than sunlight, you are definitely not alone. Retractable window screens are incredibly convenient, but they can be tricky to clean if you have never done it before. One wrong move and you could end up with a bent housing, a tangled screen, or worse, a screen that no longer retracts smoothly.
The good news is that learning how to clean retractable window screens is much easier than it looks, and you do not need any fancy tools or professional experience to get it done right. With just a few household supplies and some simple techniques, you can have your screens looking fresh and functioning perfectly again.
In this guide, we will walk you through everything step by step, from gathering your supplies to safely cleaning the housing without causing any damage. Whether you are a first-time homeowner or just new to this type of screen, by the end of this post you will feel completely confident tackling the job on your own.
Why Retractable Window Screens Need Different Care
If you’ve ever cleaned a regular window screen, you know the drill: pop it out, take it to the driveway, scrub it down, rinse it off, and you’re done. Retractable window screens don’t give you that option, and that changes everything about how you need to approach cleaning them.
Here’s the core issue. When you retract a retractable screen, it rolls back into an enclosed housing unit built into your window frame. Whatever is sitting on that mesh, including dust, pollen, and tiny debris particles, gets pulled right inside that housing along with it. Over time, that buildup can jam the tracks, strain the internal spring mechanism, and cause the screen to stop retracting smoothly. As one maintenance guide notes, even a single grain of sand in the track can cause the screen to jump off course.
It’s also worth knowing that retractable window screens are a different animal from retractable screen doors or motorized patio screens. Window-mounted versions are smaller, accessed at height, and face mostly airborne debris like pollen and dust rather than the pet hair and gravel that collect in floor-level door tracks. That difference in debris type and access angle directly shapes your cleaning approach.
Unlike standard screens, the mesh in most retractable window screens is integrated into the cassette system and cannot be safely removed. That means in-place cleaning is your only realistic option, so gentle technique matters more than it does with removable screens.
If your retractable screen is a solar screen with denser mesh designed to block heat and UV rays, expect it to trap more particulate matter than standard fiberglass mesh. And if you haven’t cleaned since last fall, spring is the time to prioritize it. Winter debris compacts inside the housing, and spring pollen season adds a fresh wave of buildup almost immediately, making that first warm-weather cleaning genuinely important.
What You Will Need: Tools and Supplies
Before you get started, gather everything on this list. Having the right supplies on hand makes the whole process smoother and, more importantly, keeps your screen safe.
What to grab:
- Mild dish soap mixed into warm water (just a few drops, not a full squeeze)
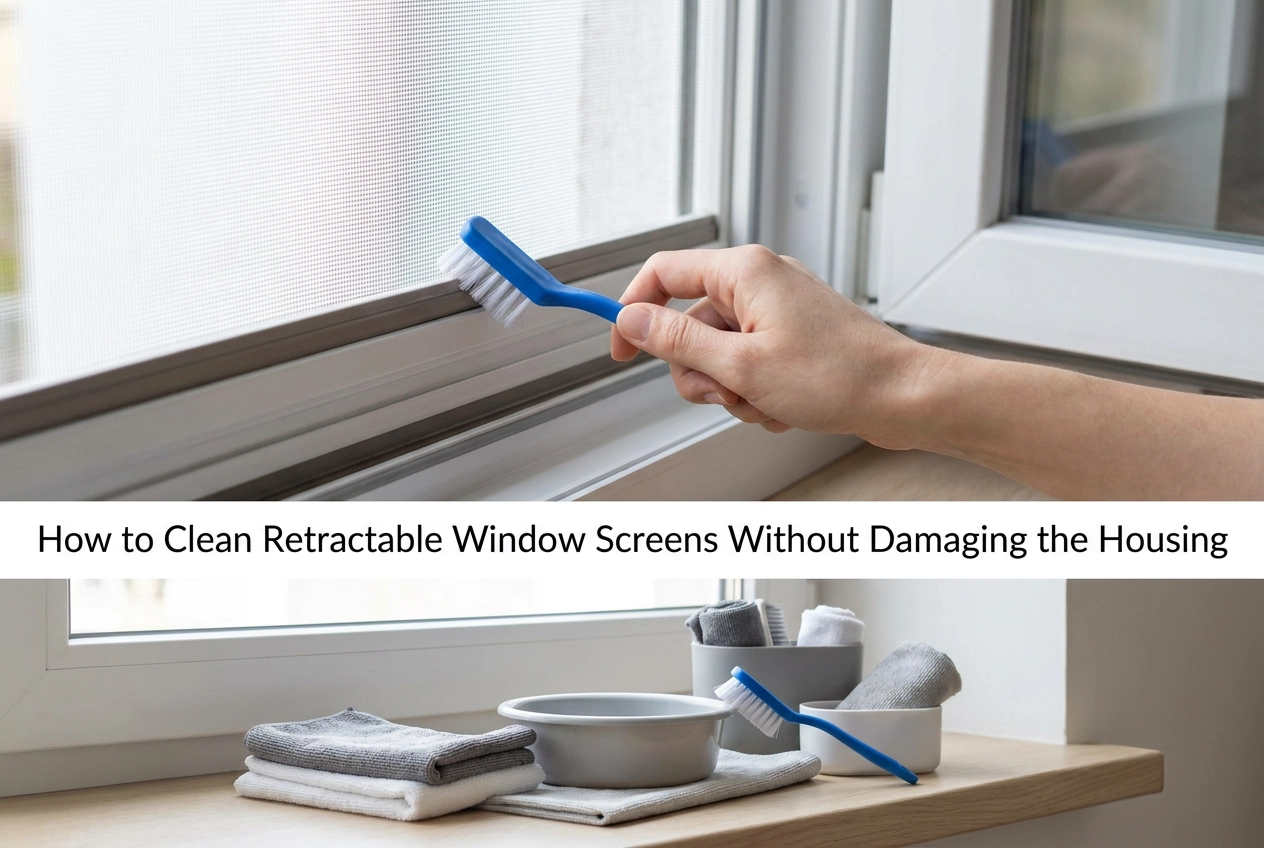
- A soft-bristle brush, like a dedicated screen brush or a clean, unused paintbrush
- Two microfiber cloths, one for applying the soapy solution and one for drying
- A spray bottle for applying water with gentle, controlled pressure
- A dry towel for blotting the track channels and housing edges after cleaning
The spray bottle detail matters more than it sounds. Pouring water directly onto a retractable screen can push moisture straight into the housing mechanism, which is exactly where you do not want it pooling. A spray bottle keeps things targeted and low-pressure.
What to avoid entirely:
Pressure washers, steel wool, abrasive scrub pads, ammonia-based glass cleaners, and any solvent-based product should stay far away from your retractable screen. These are the most common causes of premature mesh damage. The Andersen retractable screen care guide reinforces this, noting that the mesh is designed to release under pressure as a safety feature, meaning aggressive scrubbing or water force can accidentally dislodge it during cleaning.
Once everything is assembled, you are ready to start the actual cleaning process.
Step-by-Step: How to Clean Retractable Window Screens
Now that your supplies are ready, it’s time to work through the process from start to finish. Follow these steps in order, and don’t skip ahead, especially when it comes to drying.
Step 1: Fully Extend the Screen
Pull the screen all the way out until it is completely taut and locked into position. Every inch of the mesh needs to be accessible before you touch it with a brush or cloth. Cleaning a partially retracted screen is a bad idea because you risk pushing dirt and debris directly into the housing, and you can also put uneven stress on the mesh. Take an extra moment here to make sure the screen is secure and not going anywhere.
Step 2: Dry Brush the Mesh First
Before any water or soap gets involved, grab your soft-bristle brush and work across the mesh using light, downward strokes. This knocks loose pollen, dust, and surface debris off the screen before moisture has a chance to turn that grime into a muddy paste that clogs the mesh. A vacuum with a soft brush attachment works great here too, especially if the screen has been collecting fine dust for a while. This dry pass only takes a minute or two but makes the wet cleaning steps noticeably easier.
Step 3: Apply Your Soap Solution
Dip your microfiber cloth or soft brush into your mild dish soap solution and begin working it across the mesh in gentle circular motions, starting at the top and moving downward. Keep your pressure light and consistent. Pay extra attention near the center of the screen where grime tends to build up the most. When you reach the edges where the mesh meets the frame, ease up on the pressure. That junction is a stress point, and scrubbing too hard there can fray the mesh or loosen how it sits in the frame. According to how to clean motorized retractable screens, mild soap and soft tools are the go-to approach recommended by screen care professionals.
Step 4: Rinse Carefully
Wipe the screen down with a clean, damp cloth to remove the soap, or mist it lightly with plain water from a spray bottle held at least 12 inches away from the surface. The key rule here: do not aim water at the housing opening. Water getting inside the housing can soak the rolled mesh stored in there and wet the internal spring or roller components, which leads to corrosion and stiffness over time. This is one of those small details that makes a big difference in how long your screen lasts.
Step 5: Let It Air Dry Completely (Do Not Skip This)
This is genuinely the most important step in the entire process. Once the screen is rinsed, leave it fully extended and let it air dry completely before you even think about retracting it. Retracting a damp screen traps moisture inside the housing, where it can cause mold to grow on the mesh, corrode metal components, and make the rolling mechanism stiff and hard to operate. On a humid day, give it extra time. Run your hand across the full surface and confirm it is dry to the touch before moving on. You can also find helpful visual guidance on how to do maintenance on your retractable screens that reinforces this point clearly.
Step 6: Clean the Track and Side Channels
While the mesh is drying, use a dry cloth or lightly damp one to wipe out the side guide channels, the bottom bar, and the exterior of the housing. Debris that collects in the tracks is one of the most common reasons retractable screens start catching or rolling unevenly over time. A quick wipe-down now prevents a bigger headache later. Avoid spraying water directly into any seams or openings on the housing itself.
Step 7: Retract Slowly and Pay Attention
Once everything is dry, retract the screen slowly and stay alert. If you feel any resistance, notice the screen catching, or hear unusual sounds like grinding or clicking, stop and investigate before forcing it. These are signals that debris may still be in the track, or that something in the mechanism needs attention. A smooth, even retraction means the job is done right.
Common Mistakes That Can Damage Your Screens
Even if you follow every cleaning step correctly, a few common habits can quietly undo all that effort. These are the mistakes that cause the most damage to retractable screens, and most of them are surprisingly easy to make.
Retracting before the screen is fully dry or clean is the single most damaging thing you can do. When you roll a damp or dirty screen back into the housing, you’re pulling debris directly into the mechanism where it gets ground against the moving parts. Moisture trapped inside the housing also speeds up corrosion on metal components. Always let the mesh dry completely before retracting, no exceptions.
Reaching for a pressure washer might feel like the efficient choice, but the force stretches and distorts the mesh fibers, loosens the spline that holds the screen in the frame, and drives water deep into the housing where it has no way to evaporate. Stick to a garden hose on a gentle fan setting, or just a damp cloth.
Skipping the tracks and side channels is another mistake that adds up over time. Debris collects right at the retraction point, and eventually the screen starts catching or rolling unevenly. A quick vacuum or soft brush along the channels should be part of every cleaning session. The retractable porch screen maintenance checklist from CF Lawnings notes that a simple 10-minute monthly routine can meaningfully extend your screen’s lifespan.
Soaking solar screen mesh is a specific risk worth calling out. Solar screens use a dense, tightly woven weave designed to block UV rays, and saturating those fibers can mat them down and reduce their effectiveness. A damp cloth is always the better approach over direct spraying or soaking.
Cleaning only once a year gives dirt enough time to bond to the mesh coating. At that point, removing it requires scrubbing that damages the fibers. Twice a year, once in spring and once in fall, is the baseline that keeps buildup manageable and your screen in good shape.
Cleaning Solar Screen Mesh: A Few Extra Steps
Solar screen mesh is built differently than the standard fiberglass mesh on regular window screens. It has a denser weave designed specifically to block heat and UV rays, and that tighter construction works against you at cleaning time. All those tiny openings trap fine particles like pollen, exhaust soot, and dust more readily than a looser mesh would. The result is a screen that gets grimy faster and needs a little more attention to clean properly.
The most important rule with solar mesh: skip the hose. Spraying or soaking solar mesh can temporarily flatten the weave, which reduces both airflow and outward visibility until it fully dries out. Stick with the damp microfiber cloth method covered earlier in this guide, wiping gently across both sides of the mesh. Canvasworks offers helpful guidance on retractable solar screen maintenance that reinforces this controlled-moisture approach.
If your solar screen still looks gray or dingy after a thorough cleaning, that is not a dirt problem. That persistent dullness usually means the solar coating itself has degraded from years of UV exposure, and no amount of scrubbing will reverse that. At that point, the right move is rescreening with fresh solar mesh rather than continuing to clean a screen that has lost its UV-blocking effectiveness.
Sun-facing windows also deserve more frequent attention than north-facing ones. Direct UV exposure accelerates how quickly debris bonds to the mesh surface, so those screens may need cleaning every month or two during spring and summer rather than just once a season.
If you are unsure whether your solar mesh still has effective UV-blocking capacity or needs replacing, Sparkletechsunscreens.com specializes in solar screen installation and rescreening and can help you make that call.
When Cleaning Is Not Enough: Signs You Need Repair or Rescreening
Sometimes cleaning reveals a problem it cannot fix. If you finish a full cleaning session and something still looks or feels off, that is your screen telling you it needs more than a wipe-down.
Tears, holes, or fraying mesh are the clearest signal. Cleaning does not close gaps in the mesh, and even a small tear will grow faster in a retractable screen because the material flexes and coils every time the screen moves. A damaged mesh lets insects and debris pass through freely, which defeats the whole purpose of having a screen in the first place.
Pay attention to how the mechanism feels. If the screen still catches, resists, or makes a grinding sound after a thorough cleaning, the problem is inside the housing. Compacted debris, worn springs, or damaged internal components are not things you can reach with a soft brush. That kind of issue needs a professional look before it gets worse.
Check whether the mesh snaps taut when extended. A screen that sags or bows in the middle has stretched past its usable tension. Cleaning will not restore that snap; rescreening with fresh mesh is the only fix.
Rust, warping, or corrosion on the frame or housing is another sign that you are past cleaning territory. As noted in this guide to window screen repair vs. replacement, corroded frames lose structural integrity and may not hold new mesh properly, making professional assessment the smarter first step.
The good news is you do not have to leave a damaged screen in place. Sparkletechsunscreens.com offers same-week rescreening and repair services, so a quick inspection can get your screen back to working order fast.
Keep Your Screens Clean and Your Housing Protected
The golden rule of retractable screen care is worth repeating one final time: always clean your screen completely and let it dry fully before rolling it back into the housing. Trapping even a little moisture inside the housing creates the conditions for mold, corrosion, and mechanism damage that no amount of cleaning can reverse.
A twice-yearly cleaning schedule is the practical sweet spot for most homeowners, with spring as your highest-priority session. Winter leaves behind a buildup of pollen, grime, and condensation that needs to come off before you start relying on your screens all summer long. If you have solar screen mesh, remember to stick with the damp-cloth technique only; rinsing or soaking forces water into the dense weave and puts your housing at risk.
Every cleaning session is also your best chance to catch small problems before they become expensive ones. Check for tears, track misalignment, and any early signs of frame corrosion while you already have the screen extended and your supplies out.
If you spot damage during your next cleaning or simply want a professional set of eyes on your screens, Sparkle Tech Sunscreens offers same-week repair, rescreening, and screen cleaning services. Reach out and let us handle the hard part.
Conclusion
Cleaning your retractable window screens does not have to be stressful or complicated. By gathering the right supplies ahead of time, using gentle cleaning techniques, handling the housing with care, and allowing everything to dry completely before retracting, you can keep your screens in excellent condition for years to come.
The best part? You now have everything you need to get started today. No professional help required, no expensive equipment, just a little time and the right approach.
Go ahead and give your screens the refresh they deserve. Once you see how much clearer your windows look and how smoothly your screens glide again, you will wonder why you waited so long. If this guide helped you out, share it with a neighbor or friend who could use the same simple win around the house.