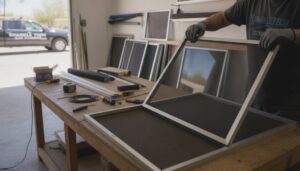


There’s nothing quite like a fresh breeze flowing through clean windows, but if your screens are caked with dust, pollen, and grime, that “fresh air” isn’t so fresh anymore. Sound familiar? If you’ve been putting off tackling those dirty screens because you’re not sure where to start, you’re in the right place.
Learning how to clean nylon window screens is actually much easier than most people think, and the best part is that you don’t need expensive tools or professional help to get it done. With just a few simple supplies and a little bit of know-how, you can have your screens looking almost brand new without accidentally tearing or warping the delicate mesh.
In this guide, we’ll walk you through everything step by step, from gathering your supplies to drying your screens the right way. Whether this is your first time cleaning them or you’ve made a few mistakes in the past, these tips are beginner-friendly and easy to follow. Let’s get those screens sparkling clean.
What Makes Nylon Screens Different from Fiberglass or Aluminum
Not all window screens are created equal, and if yours happen to be nylon, that distinction matters a lot before you grab a scrub brush or turn on the hose.
Nylon mesh is noticeably more flexible and lightweight than fiberglass. That flexibility might sound like a perk, but it actually creates a real vulnerability during cleaning. Where a fiberglass screen would simply resist moderate pressure, nylon can stretch, sag, or permanently deform under that same force. Press too hard with a scrubbing pad or angle a hose too aggressively, and you can distort the mesh weave enough to create gaps that bugs will happily use as an entrance, even though the frame looks completely fine from a distance.
UV sensitivity is another area where nylon stands apart. Prolonged sun exposure gradually breaks down the fibers at a molecular level, weakening the mesh long before any visible damage appears. According to Glide Cleaners’ screen cleaning guide, UV degradation can make mesh feel stiff or cause the weave to separate under light pressure, which is a sign of brittleness rather than just dirt. On an already sun-weakened nylon screen, even a gentle cleaning session carries more risk than most homeowners realize.
The bigger problem is that most cleaning advice you’ll find online was written with fiberglass as the assumed default material. As ClearWave’s comparison of aluminum vs. fiberglass screens illustrates, nylon doesn’t even come up in standard residential screen discussions. That content gap means homeowners following perfectly reasonable, widely shared cleaning tips can accidentally damage their nylon screens using techniques that would work just fine on fiberglass. Knowing what your screen is made of before you start cleaning is genuinely the most important first step.
What You’ll Need Before You Start
Before you touch your screens, it helps to gather everything upfront so you’re not scrambling mid-clean with soapy hands.
Your cleaning solution is the most important call you’ll make. Mix one tablespoon of mild dish soap into a gallon of warm water, or use a biodegradable all-purpose cleaner diluted to the same ratio. Keep the pH between 6.5 and 7.5 to protect the mesh. Bleach oxidizes nylon fibers, ammonia weakens their tensile strength, and acetone (hiding in some multi-surface sprays) can actually dissolve the polymer structure. Check your labels before you mix anything.
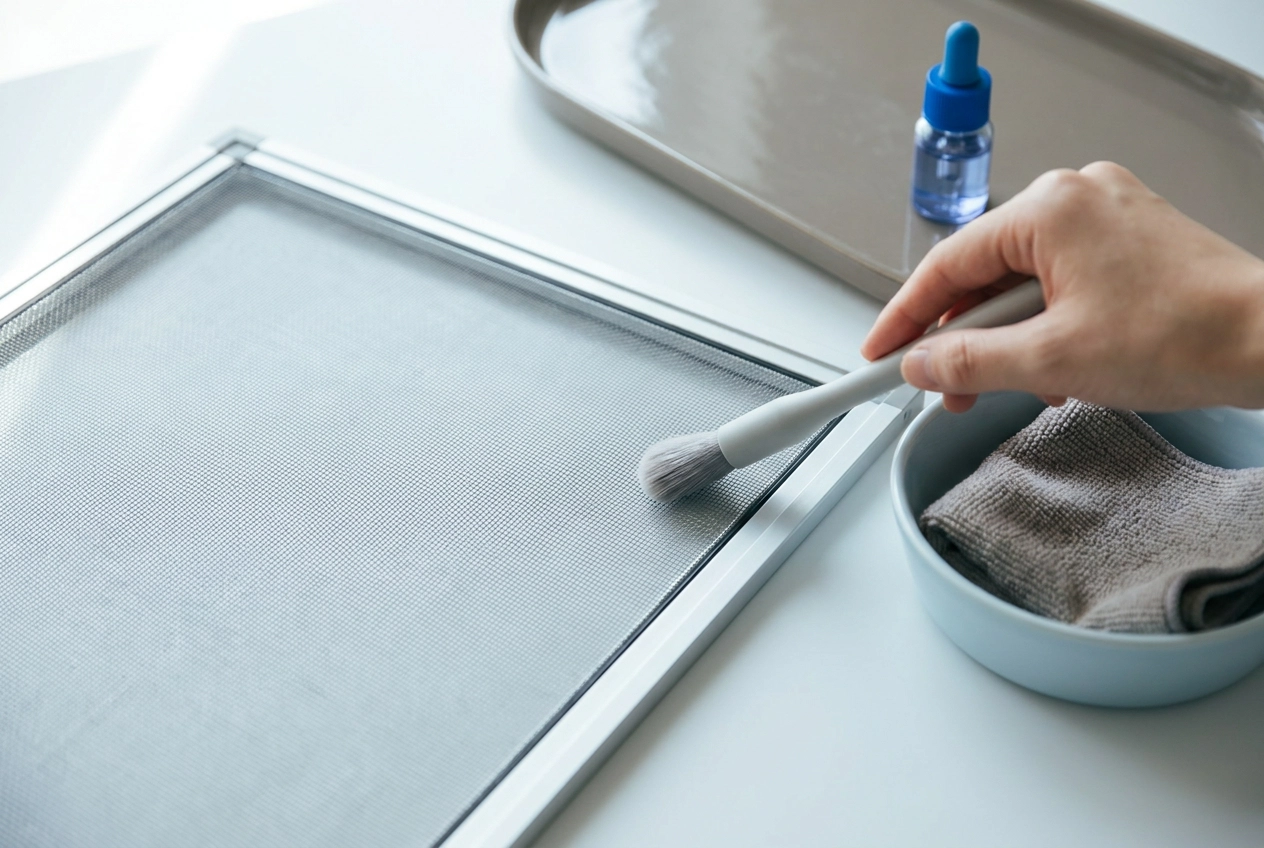
For scrubbing, reach for a soft-bristle brush with fine bristles, ideally 0.15 to 0.20 mm diameter. An old toothbrush works perfectly for corners and frame edges. Coarser bristles can snag individual strands and pull the weave out of alignment permanently.
Grab two or three microfiber cloths rated at least 300 GSM. Unlike cotton rags or paper towels, microfiber won’t shed lint into the mesh intersections.
For rinsing, use a garden hose set to a gentle shower or fan spray, keeping pressure under 30 PSI. Angle it downward at roughly 45 degrees. Per this complete technical guide on washing window screens, even low-PSI pressure washer attachments can stretch the weave and dislodge rubber splines irreversibly.
Skip entirely: stiff brushes, abrasive sponges, bleach sprays, and Magic Erasers. Magic Erasers are made of melamine foam, which is micro-abrasive and will fray nylon fibers at a microscopic level, even though they feel soft to the touch.
How to Clean Nylon Window Screens: Step by Step
Now that you have everything gathered and ready to go, here is exactly how to work through the cleaning process from start to finish. Follow these steps in order, and do not skip ahead. Each one sets up the next.
Step 1: Remove Loose Dust First
Before a single drop of water touches your screen, take a dry soft-bristle brush or your vacuum with a brush attachment and go over the entire mesh surface. Use low suction if you’re vacuuming, and work gently from top to bottom. This dry pass typically takes less than two minutes per screen, but it makes a noticeable difference in the results.
Here is why it matters so much for nylon in particular. Nylon mesh is finer and more flexible than aluminum or fiberglass, which means dust and pollen settle deeper into the weave. If you wet the screen before clearing that surface layer, the dry debris turns into a muddy paste that clogs the mesh holes and becomes much harder to rinse out. You end up working twice as hard for a worse outcome. Start dry, every single time.
Step 2: Mix Your Cleaning Solution
Fill a bucket with warm water and add just a few drops of mild dish soap or a capful of biodegradable cleaner. Give it a gentle stir. The water should feel slightly slippery when you dip your fingers in, but you should not see thick, foamy suds building up on the surface.
That foam is actually a problem. Heavy suds are difficult to rinse completely out of tight mesh weave, and any soap left behind in the holes creates a sticky film that pulls in airborne dust and pollen much faster than a clean screen would. You end up with a screen that looks dirty again within days. A light, barely-soapy solution is genuinely more effective than a sudsy one, so resist the urge to squeeze in extra soap.
Step 3: Wash the Mesh with a Soft Brush
Dip your soft-bristle brush into the solution and start working on a small section of the screen, roughly the size of your hand. Use small circular motions with light, even pressure. Nylon mesh does not need aggressive scrubbing; it needs thorough, patient coverage. Work your way across the screen in overlapping sections so you do not miss any spots.
Here is a practical visual cue that professional window cleaners use: keep brushing each section until the mesh holes look uniformly filled with soapy water. When the holes appear consistently wet and soapy all the way through, that is your signal that the solution has fully penetrated and lifted the grime rather than just sitting on top. If some holes still look dry or uneven, keep going on that section before moving on. For larger screens, an extendable-handle brush lets you work with the screen lying flat, which helps prevent accidental bending of the frame.
Step 4: Rinse Thoroughly with Low-Pressure Water
This is the step most people rush through, and it is honestly the one that determines whether your cleaning lasts or fades within a week. Pick up your garden hose and set it to a gentle, steady stream. Run it across the screen at a low angle, moving slowly from top to bottom, until the water running off the screen is completely clear with zero soapiness.
Do not use a pressure washer or a high-pressure nozzle setting. Nylon mesh is flexible enough that concentrated water pressure can stretch the weave or even punch small holes through it. A gentle garden hose rinse gets the job done without any risk of damage. Keep rinsing even after it looks clean; soap residue is often invisible until the screen starts attracting dust again two days later.
Step 5: Dry with Microfiber Before Reinstalling
Give the screen a firm shake to knock off the bulk of the water, then wipe both sides down with a dry microfiber cloth. Microfiber lifts the remaining moisture without leaving lint behind, which matters because anything left in the mesh becomes a dust trap.
Do not reinstall the screen while it is still damp. This is especially important if you have wooden window frames or live somewhere with high humidity. Moisture trapped between the screen frame and the window frame creates ideal conditions for mold growth on the sill and the surrounding materials. Set the screen against a wall or lay it flat in a sunny spot for a few minutes if you are not sure it is fully dry. A little patience here protects both your screen and your window frame from damage down the road.
How to Clean Nylon Window Screens Without Removing Them
Sometimes removing a screen just is not the right call. If you are dealing with a second-story window, a frame that feels stiff or slightly warped in its track, or a screen that wobbles when you touch it, pulling it out creates more risk than the cleaning job is worth. The good news is that in-place cleaning works genuinely well for nylon screens, and Martha Stewart’s guidance on cleaning screens from inside the home confirms you do not need to remove anything to get solid results.
Cleaning the Indoor-Facing Side
Start by laying a dry towel along the full length of your windowsill. This catches drips before they soak into the sill or run down your wall, and it saves you from cleaning up a second mess after you finish the screen. Dampen a microfiber cloth or soft-bristle brush with your soapy solution and wipe the interior-facing side of the screen using smooth, horizontal passes from top to bottom. Keep your touch light. Because nylon mesh is more flexible than fiberglass, pressing too firmly will bow the screen outward against its frame, and repeated pressure like that can stretch the mesh out of shape over time. Work section by section, rinsing your cloth frequently so you are lifting dirt rather than spreading it around.
Reaching the Exterior Side Without Full Removal
Getting to the outside face of the screen takes a little more creativity. If you have a second person available, have them apply the soapy solution from outside using a long-handled soft brush while you guide them from inside. If you are working solo, open the window as far as it safely allows and use a sponge mop head on an extended handle. Professional window cleaners specifically recommend the sponge mop approach because the sponge material fills the mesh holes evenly with soapy solution rather than just skimming the surface. Follow that up with a damp rinse cloth on the same handle, and you have covered both sides without ever unlatching the screen.
A Special Note on Screen Doors
Screen doors deserve their own mention here because they are genuinely tricky to reinstall once you take them off the track. Worn wheel hardware and track misalignment are common in older doors, and even a door that slides smoothly in place can become a frustrating puzzle once it is lifted out. Clean your screen door while it stays in the track. Work top to bottom with a soft brush and your mild soapy solution, then rinse using a low-pressure spray bottle or a damp cloth rather than a garden hose. A hose introduces more water than the door frame needs, and excess moisture sitting in the bottom track can cause its own problems. Keeping the door in place the whole time protects both the screen mesh and the hardware, and you will be done in a few minutes without the reinstallation headache. For a broader look at screen care as part of window maintenance, Andersen Windows covers this approach well as part of their overall window upkeep guidance.
What NOT to Do When Cleaning Nylon Window Screens
Knowing what to avoid is just as important as knowing the right steps, and with nylon screens specifically, a few common shortcuts can cause damage that no amount of re-cleaning will fix.
Skip the Pressure Washer
It might be tempting to blast away months of grime with a pressure washer or even a high-pressure hose attachment, but this is one of the fastest ways to ruin a nylon screen. Even a brief burst of high-pressure water can permanently stretch the mesh out of alignment, pulling the weave into irregular gaps that let bugs through and reduce the effectiveness of solar screens. Unlike fiberglass, nylon does not have the structural rigidity to bounce back after that kind of tensile stress. Once it is stretched, it stays stretched. A gentle garden hose on a low-pressure setting is all you ever need.
Put Down the Bleach
Bleach, acetone, and solvent-based cleaners are a hard no for nylon mesh. These chemicals break down nylon polymer fibers at a molecular level, causing brittleness and discoloration over time. The tricky part is that the damage is not always obvious right away. A screen can look completely fine after a bleach cleaning and then fail structurally within a single season as the fiber degradation quietly progresses. Stick to mild dish soap diluted in warm water, as recommended by screen care professionals, and you will never have to worry about this.
Avoid Abrasive Scrubbing Tools
Rough sponges, stiff-bristle brushes, and abrasive pads are not appropriate for nylon mesh. Nylon frays at mesh edges and intersections much more readily than fiberglass does, and scrubbing accelerates that fraying, especially along the spline channel where the mesh is already under the most sustained tension. A soft microfiber cloth or a gentle soft-bristle brush does the job without causing structural harm, as noted in guidance from window care experts at Renewal by Andersen.
Always Finish With a Full Rinse
Skipping the rinse to save a few minutes is a mistake that backfires quickly. Soap residue left on nylon mesh creates a hydrophobic film that actually repels clean water while trapping airborne dust and pollen particles. Your screen ends up looking dirty again within days, sometimes faster than it did before you cleaned it. Professional window cleaners consistently flag incomplete rinsing as one of the most counterproductive habits homeowners pick up.
It is also worth noting that several of these hazards apply specifically to nylon rather than fiberglass. Fiberglass is more chemically inert and structurally stiffer, so techniques that leave a fiberglass screen unharmed can visibly distort or degrade a nylon one. If a general screen-cleaning guide does not specify mesh material, read carefully before following its advice.
How Often Should You Clean Nylon Window Screens?
For most homes, cleaning window screens once or twice a year is a solid baseline to work from. Spring is the most popular time to tackle this task, and for good reason. After months of winter, your screens have been quietly collecting dust, grime, and whatever else the cold season pushed against your home. Getting them clean before you start opening windows regularly means that fresh air coming into your home is actually fresh, not filtered through a layer of accumulated debris.
That said, where you live can change this schedule pretty significantly. If you are in a high-pollen area, plan for a thorough cleaning once peak tree and grass pollen season winds down, since nylon mesh catches pollen aggressively. Homes in desert or semi-arid climates deal with a different problem: fine dust particles that work their way into the mesh weave during frequent dust events, slowly reducing airflow over time. In those environments, three or more lighter cleanings spread across the year tend to keep things manageable rather than letting buildup turn into a bigger job.
For homeowners in the Southwest specifically, post-monsoon cleaning is worth putting on your calendar. Late-summer storm systems deposit a clay-rich dust across screens that gets sticky as it dries and bonds to the nylon fibers in a way that regular dry dust simply does not. Catching it while it is still relatively fresh makes removal much easier.
Beyond any set schedule, your screens will also tell you when they need attention. If they look gray or brownish in daylight instead of their original color, or if you notice debris sitting along the bottom of the frame, those are clear signals. Reduced airflow with the window open or a musty smell after rain are two more cues worth acting on, and both point to a screen that is overdue for a good rinse.
When Cleaning Is Not Enough: Signs Your Screen Needs Repair or Rescreening
Sometimes cleaning reveals something more serious hiding underneath all that dust and grime. Once your nylon screen is clean and dry, take a few minutes to inspect it carefully from both the inside and outside of your window. What you find might tell you that a cleaning pass was the right call, or it might tell you something else entirely.
Sagging or wavy mesh is one of the clearest signs that cleaning will not solve the problem. If your screen still looks loose or droopy after washing, the nylon has stretched past its elastic limit and simply will not bounce back. This is a mechanical failure, not a dirt issue. No cleaning method restores tension to mesh that has permanently deformed, so a rescreen is the only real fix here.
Visible tears, holes, or fraying near the spline channel tell a similar story. Even a tiny tear can let bugs through, and small holes tend to get worse quickly with regular handling. If you are spotting any of these during your post-clean inspection, another cleaning pass will not help. The mesh needs to be replaced, not rewashed.
Frame damage is its own separate category. A bent, warped, or corroded frame prevents the screen from sitting flush in the window track, which leaves gaps at the edges even when the mesh is perfectly intact. Frame repair or replacement is a distinct service from rescreening, so it is worth noting which problem you actually have before calling for help. You can learn more about repairing your window screens and frames like a pro to better understand the difference.
Solar screens have their own set of warning signs to watch for. Unlike standard insect screens, solar screens are designed to block heat gain, so when their UV-protective coating breaks down, the energy performance suffers even if the mesh looks physically okay. Signs of solar screen degradation include fading or uneven color across the panel, visible holes in the dense weave, and sections where the mesh has pulled away from the frame edge. These issues compromise your screen’s ability to block solar heat, which is the whole point of having them.
If your post-clean inspection turns up any of these issues, Sparkle Tech Sunscreens offers same-week rescreening, frame repair, and solar screen services so you are not left waiting around with a damaged screen. Sometimes a good cleaning is all a screen needs, and sometimes it just reveals that it is time for the next step.
Keep Your Screens Clean, and Know When to Call It
The rules for cleaning nylon screens are pretty simple once you know them: use gentle tools, rinse thoroughly, keep pressure low, skip the harsh chemicals, and always let your screens dry completely before putting them back in. These habits are not just about having cleaner windows. They actively protect the nylon fibers from the grit and pollen that embed in mesh over time and slowly grind the material down every time the wind moves or a hand brushes against the frame. A little regular maintenance adds years to a screen’s usable life.
It is also worth repeating that cleaning in place is not a lazy workaround. For screen doors and upper-floor windows, it is often the smarter approach, reducing the risk of bending frames or stressing the mesh during removal and reinstallation.
That said, cleaning sometimes reveals that a screen has moved past the point where a good scrub helps. Sagging mesh, visible tears, a frame that is bent or separating at the corners, or solar mesh that looks brittle or discolored are all signs that maintenance is no longer enough.
If that is where you have landed, Sparkle Tech Sunscreens handles rescreening, solar screen installation, and screen door repair, with same-week service available for homeowners who are ready to move past the DIY stage.
Conclusion
Cleaning your nylon window screens does not have to be a stressful or complicated job. By using the right supplies, working gently with soft brushes or cloths, rinsing thoroughly, and allowing your screens to air dry completely, you can protect the mesh while still getting great results. Taking the time to clean your screens regularly also means better air quality inside your home and a longer lifespan for the screens themselves.
Now that you have everything you need to get started, there is no reason to put it off any longer. Pick a clear day, gather your supplies, and give those screens the refresh they deserve. Once you see how much of a difference clean screens make, you will wonder why you waited so long. Your home, and your lungs, will thank you.