

Those dark, fuzzy spots on your window screens are more than just an eyesore. Mold thrives in damp, shaded areas, and window screens are the perfect breeding ground, especially after a humid season or a stretch of rainy weather. Left untreated, mold can spread, weaken the screen material, and even affect the air quality inside your home.
The good news is that learning how to clean moldy window screens is easier than you might think, and you likely already have everything you need at home. In this guide, we will walk you through a simple, step-by-step cleaning process that is safe, effective, and beginner-friendly. You will also learn how to spot the warning signs that tell you a screen is beyond saving and needs to be replaced entirely.
Whether you are tackling this as part of a seasonal deep clean or addressing a sudden mold problem, this guide has you covered. By the end, you will feel confident handling moldy screens and keeping them in better shape for the long term.
Why Window Screens Grow Mold
Mold doesn’t appear on window screens by accident. It follows a predictable pattern driven by moisture, organic debris, and the right temperature conditions. According to the EPA’s guide to mold and moisture, mold requires only three things to colonize a surface: moisture, a food source, and suitable temperatures. Window screens check all three boxes year-round.
Rain, morning dew, and outdoor condensation keep screen mesh intermittently wet throughout every season. Because screens are suspended in open frames rather than solid surfaces, water clings to individual fibers and evaporates slowly, especially on north-facing windows or screens shaded by trees or roof overhangs. Relative humidity at or above 60% creates a reliably mold-friendly environment, and once favorable conditions form, mold spores can begin spreading within 48 hours.
Through fall and winter, screens quietly accumulate a layer of organic debris including pollen, dust, dead insects, and airborne particulates. This buildup sits dormant in cooler temperatures, but when spring arrives with rising humidity and temperatures between 70°F and 90°F, that debris becomes a ready nutrient base for rapid mold colonization.
Not all screens carry equal risk. Solar screen mesh features a denser weave pattern than standard fiberglass or aluminum, which means it traps more moisture and debris between its fibers. That tighter structure slows drying time considerably, making solar screens especially prone to mold buildup after rain or heavy dew. Screen doors face a separate set of challenges: their ground-level position exposes them to soil splashback during rain, plus the organic debris tracked in by foot traffic and pets.
Homes in coastal environments, humid southern climates, or heavily shaded lots face the fastest mold colonization because screens in those conditions rarely dry completely between moisture events. In these environments, routine cleaning isn’t optional; it’s the primary defense against visible mold growth and the indoor air quality concerns that come with screens positioned directly at open windows.
Mold vs. Dirt vs. Algae — How to Tell the Difference
Before you reach for a cleaning solution, take a moment to identify exactly what you are dealing with. Dirt, mold, and algae each require a different approach, and misidentifying the problem can lead to ineffective cleaning or unnecessary damage to your mesh.
Dirt and dust are the easiest to recognize. They accumulate as a uniform grey or brown film spread relatively evenly across the screen surface. The most telling sign: dirt lifts away cleanly with dry contact and leaves a grey, powdery residue on whatever touches it. It does not stain the mesh fibers.
Mold behaves differently. Rather than sitting loosely on the surface, mold embeds itself into the mesh fibers, which is why it smears or leaves a stain when touched. It typically presents as fuzzy or powdery spots in black, green, or white, and tends to concentrate in corners and along frame edges where moisture lingers after rain or condensation.
Algae is often mistaken for mold because both can appear green. However, algae has a distinctly slimy texture and forms in irregular patches on screens that stay wet and receive indirect sunlight. Window cleaning professionals in high-humidity regions report that algae on screen enclosures is extremely widespread, and that what homeowners frequently call “green mold” is actually algae requiring a different cleaning strategy.
To confirm what you are looking at, use this simple test: press a dry white cloth or paper towel firmly against the discolored area. A grey, powdery transfer points to dirt. A green, dark, or streaky smear indicates mold or algae. You should also trust your nose. A musty odor near an open window is a strong indicator of active mold growth, even when visible discoloration appears minimal.
What You Will Need Before You Start
Gathering the right supplies before you begin will save time and protect both your screens and your health. Having everything within reach means you will not need to stop mid-task with wet, mold-covered hands.
Cleaning Solutions
For most mold situations, white distilled vinegar diluted to a 1:1 ratio with water is your safest starting point. Mix equal parts vinegar and water in a spray bottle, and you have an effective mold-fighting solution that is gentle enough for both fiberglass and aluminum mesh. For heavier mold infestations, step up to a mild bleach solution: 1 tablespoon of liquid bleach per quart of water is a safe, effective ratio. Avoid stronger concentrations, as excess bleach can degrade mesh fibers and corrode aluminum frames over time. One critical warning: never mix vinegar and bleach together. These are two separate options, not ingredients to combine, and mixing them produces hazardous gases.
Scrubbing Tools
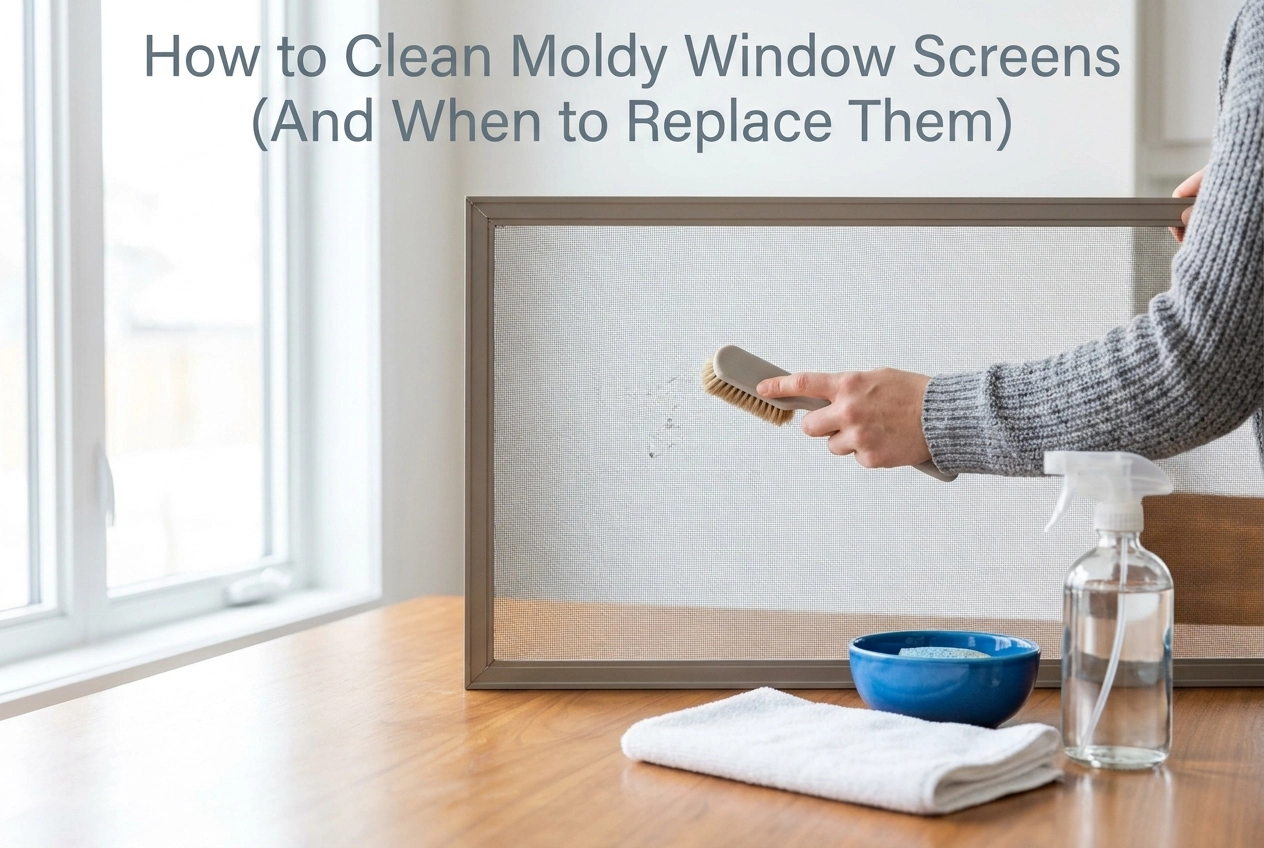
Reach for a soft-bristle brush, a microfiber cloth, or a soft toothbrush for tight corners. Stiff wire brushes and abrasive scrubbers will snag and tear delicate mesh fibers, causing damage that requires repair or full rescreening.
Safety Gear and Rinsing Equipment
The CDC recommends rubber gloves, sealed eye protection, and an N95 respirator when cleaning mold, even for small household jobs. A garden hose on a gentle spray setting or a bucket of clean rinse water will flush away residue effectively. Finally, prepare a flat dry surface lined with clean towels to lay screens on during drying, since proper airflow prevents mold from returning.
Step-by-Step: How to Clean Moldy Window Screens
With your supplies ready and your cleaning solution mixed, it is time to work through the process methodically. Follow each step in order and resist the urge to skip ahead, since the sequence itself is what protects your screens from damage while ensuring mold is fully eliminated.
Step 1: Remove and Inspect
Carefully slide or pop out each screen and lay it flat on a clean, hard surface such as a driveway or patio. Before investing any time in cleaning, examine the mesh closely in good light. Look for tears, punctures, bent or warped frames, and areas where the spline has pulled away from the channel. Physical damage creates rough surface crevices that give mold additional footholds, meaning a compromised screen will become moldy again faster than an intact one. If the damage is extensive, cleaning may not be worth the effort; rescreening is often the more practical solution.
Step 2: Pre-Rinse Both Sides
Using a garden hose set to a gentle, low-pressure spray, rinse loose surface debris from both sides of the screen before applying any cleaning solution. High-pressure settings can distort fiberglass mesh or strip protective coatings from aluminum frames, so keep the pressure low and let the water do the work. This pre-rinse removes surface dust, pollen, and loose mold fragments so your cleaning solution can penetrate directly to the remaining spores rather than being absorbed by surface grime.
Step 3: Apply Your Cleaning Solution and Let It Dwell
Spray or sponge your chosen vinegar solution or diluted bleach mixture evenly across the entire mesh surface. Pay close attention to corners and frame edges, where moisture pools and mold concentrates most heavily. According to Clorox’s mold cleaning guidance, keeping the surface visibly wet with your solution for a full 10 minutes allows it to break down mold spores at the root rather than just on the surface. Do not let the solution dry out; reapply as needed during the dwell period.
Step 4: Scrub with a Soft-Bristle Brush
Using a soft-bristle brush or clean wide paintbrush, scrub the mesh using gentle circular strokes, starting at the center and working outward toward the frame. For stubborn mold concentrated in frame crevices, an old toothbrush gives you the precision to reach tight spots without pressing hard on the mesh. Fiberglass mesh is especially vulnerable to stretching under pressure, so let the cleaning solution and gentle persistence do the heavy lifting rather than force.
Step 5: Rinse Thoroughly and Dry Completely
Rinse both sides of the screen thoroughly until all cleaning solution and loosened mold residue run completely clear. Once rinsed, prop the screen vertically or lay it flat in a sunny, well-ventilated spot and allow it to air dry fully before reinstalling. The EPA confirms that mold will not regrow where moisture is absent, making complete drying the single most important step in preventing recurrence. Never reinstall a damp screen; residual moisture trapped between the screen and window frame creates exactly the conditions that started the mold problem in the first place.
Cleaning Solar Screen Mesh — Special Considerations
Solar screens are not standard fiberglass mesh, and cleaning mold from them requires a different approach than the steps covered above. The tighter weave pattern that makes solar screens effective at blocking UV rays and reducing heat gain is the same property that makes them more vulnerable to mold. That dense structure captures and holds moisture, pollen, and organic debris far more aggressively than conventional screen mesh, creating conditions where mold can establish itself deeper within the fiber structure rather than sitting on the surface.
Because mold penetrates further into solar mesh, contact time with your cleaning solution matters more. Where a standard screen benefits from roughly five minutes of soak time, a solar screen benefits from extending that to up to 15 minutes. This gives the vinegar solution time to work its way through the layers of the weave and break down mold at the root rather than just at the surface. If you are considering bleach for a stubborn infestation, note that bleach can corrode the PVC coating on solar mesh over time; a diluted white vinegar solution is the safer long-term choice for this screen type, as outlined in this guide to cleaning solar screens.
One of the most common mistakes homeowners make with solar screens is reaching for a pressure washer. Avoid this entirely. High-velocity water forces debris deeper into the weave rather than flushing it out, and it can deform the mesh openings themselves, directly reducing the screen’s ability to block solar heat gain. A garden hose on a low spray setting is the correct tool. When rinsing, start from the interior-facing side of the screen and work outward; this pushes loosened debris away from the mesh rather than compacting it further in.
Finally, if mold returns on a solar screen within a few weeks of a thorough cleaning, repeated DIY treatment is not the solution. Rapid recurrence signals that the mesh weave is retaining moisture between weather events and not drying fully, a condition that cleaning alone cannot fix. At that point, a professional inspection or full solar screen replacement is the more effective path forward.
Screen Doors and Mold — A Separate Problem Worth Addressing
Screen doors face a fundamentally different moisture environment than the window screens mounted several feet above ground. Rainwater splashes up from concrete or wood thresholds, soil runoff wicks into the base of the frame after every storm, and the lower portion of the door rarely dries completely before the next rain arrives. This near-constant dampness at the frame base creates ideal conditions for mold to establish itself quickly, often faster than you would notice on an upper-floor window screen.
The lower mesh panel takes on additional organic material that window screens simply do not encounter. Pet noses press against the mesh, shoes brush the bottom panel on the way through, and children’s hands make frequent contact with the lower third of the door. Each of those interactions deposits skin oils, soil particles, food residue, and other organic matter directly into the mesh weave, giving mold a nutrient-rich surface to colonize. Professional window cleaners working in the field consistently note that screen doors require more frequent deep cleaning than window screens for exactly this reason, as discussed in this professional cleaning community thread.
When it is time to clean a moldy screen door, remove it from the track entirely if the hardware allows and lay it flat on a clean surface. Vertical scrubbing causes cleaning solution to run downward before it can penetrate the mesh, and scrubbing a door in place puts stress on the frame corners and roller hardware. Simple Green’s screen door cleaning guide recommends deep cleaning at the beginning and end of each season, a cadence that reflects just how much debris accumulates on screen doors compared to standard window screens.
Once the door is flat, focus your scrubbing attention on the bottom rail, the lower panel corners, and any rubber or foam weatherstripping running along the frame edges. These areas retain moisture the longest after rain or cleaning, making them the most common mold initiation points on any screen door. Work your cleaning solution into the weatherstripping with a soft brush rather than wiping over it, since mold roots itself into the foam or rubber material and surface wiping alone will not remove it.
If the lower mesh panel continues to show mold growth even after thorough cleaning, the mesh itself may be too degraded to recover. In that case, a partial rescreen of the lower panel is a practical, cost-effective solution. There is no need to replace the entire door screen when only one section is compromised, and a professional rescreening service can replace just that lower panel while leaving the rest of the door intact.
How Often Should You Clean Window Screens to Prevent Mold?
For most homes in temperate climates, a deep screen cleaning twice per year provides adequate protection against mold growth. Schedule one session in early spring, ideally in March or April, and one in late fall before closing windows for the season. These two cleanings target the seasonal accumulation of debris and trapped moisture that creates the conditions mold needs to establish itself.
Homes in humid regions, coastal environments, or heavily shaded yards require a more aggressive schedule. Screens in these conditions rarely dry out fully between rain cycles, meaning moisture sits trapped in the mesh long enough for mold spores to take hold. If your home fits any of these descriptions, plan for quarterly cleanings instead.
Between deep cleanings, a brief visual inspection every month or two during warm seasons is one of the most effective prevention habits you can build. Catching mold at the pinpoint stage takes only minutes to address with a damp cloth and a mild cleaning solution. A fully colonized screen, on the other hand, can require a dedicated 30-minute cleaning session or, in severe cases, full replacement.
After any extended stretch of rainy weather lasting several days, take five minutes to wipe down screen frames and the lower mesh panels with a dry cloth. Mold can begin establishing itself on damp organic matter within 24 to 48 hours, so removing surface moisture promptly breaks that window entirely.
Spring carries the highest mold risk of any season. Rising temperatures and humidity arrive just as months of accumulated winter debris sit wet on your screens. Prioritize a thorough cleaning in March or April, before you begin regularly opening windows and circulating that air through your home.
When Cleaning Is Not Enough — Replace or Repair?
Cleaning can solve a lot, but it has real limits. Once mold has penetrated deeply enough to permanently discolor the mesh fibers, no amount of scrubbing will restore the screen to a functional state. If you pressed firmly during cleaning and noticed the mesh crumbling, fraying at the edges, or developing small pits where fibers have broken down, the structural integrity is already gone. At that point, continued cleaning is a cosmetic effort that delays an inevitable replacement while giving you a false sense of protection.
The Health Case for Acting Quickly
The stakes go beyond appearance. The EPA links indoor mold growth to respiratory irritation, allergy flare-ups, and sustained indoor air quality degradation. A heavily soiled or mold-colonized screen positioned near a frequently opened window acts as a direct delivery mechanism, pushing mold spores into your home’s interior air supply every time a breeze moves through. Research from window cleaning professionals indicates that degraded screens can reduce airflow by 30 to 50 percent, meaning a compromised screen is simultaneously blocking fresh air and introducing contaminated air. That combination makes prompt replacement a health decision, not just a maintenance preference.
Physical Signs That Replacement Is the Right Call
Beyond mold damage, look for visible holes in the mesh, sagging that cannot be tensioned back, bent frames that warp the screen’s fit, or a screen that no longer seats securely in its track. These are structural failures that no cleaning cycle corrects.
Solar screens deserve special attention here. If scrubbing has left the mesh with uneven density or visibly reduced opacity, the screen may no longer block UV at the level it was designed for. That makes replacement a functional decision as much as a cosmetic one.
Same-Week Service Means No Gap in Protection
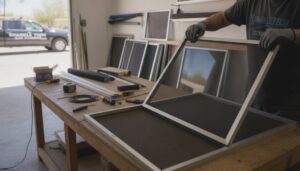
Sparkle Tech Sun Screens offers same-week rescreening and repair for window screens, solar screens, and screen doors. If your screens are showing damage beyond what cleaning can address, a fast turnaround means you are not leaving your home exposed to bugs or sun while waiting on service. Replacing a compromised screen promptly closes the loop that cleaning alone cannot.
Keep Your Screens Clean, Dry, and Mold-Free
Keeping window screens mold-free comes down to five habits practiced consistently. Identify before you clean. Mold clusters in corners and low-drainage areas of the frame, often appearing as black, gray, or green fuzzy spots. Dirt smears when brushed, algae spreads uniformly in a greenish film, and mold holds firm. Getting this right the first time means you reach for the correct solution immediately rather than cycling through products.
Match your solution to the severity. A 1:1 mix of white vinegar and water handles light mold without damaging mesh fibers. For heavier growth, a 1:64 bleach-to-water solution, roughly 3 teaspoons of bleach per 3 cups of water, applied with a soft brush and allowed to sit for 10 minutes, clears persistent colonies effectively. Never combine bleach and vinegar; the chemical reaction produces hazardous gases.
Dry completely before reinstalling. Lean screens at an angle in a sunny spot or position a fan nearby. A screen put back while still damp recreates the exact conditions that caused mold in the first place.
Clean at least twice a year, scaling to quarterly if your home sits in a coastal, shaded, or humid environment where screens stay wet for extended periods.
When cleaning stops working, rescreening is the right call. Recurring mold after multiple cleanings, permanently discolored mesh, or torn fibers that trap moisture are all clear indicators that no cleaning regimen will hold. Professional rescreening restores full protection and eliminates the moisture-trapping damage that keeps mold returning.
Conclusion
Moldy window screens do not have to be a source of stress. With the right supplies and a straightforward cleaning process, you can restore most screens to a fresh, functional condition in just a short time. Remember to catch mold early before it weakens the screen material, know when a screen is too far gone to save, and make seasonal maintenance part of your regular home care routine.
Taking action today protects your home’s air quality, extends the life of your screens, and saves you money in the long run. So grab your cleaning supplies and start with one screen. Once you see how simple the process is, you will wonder why you waited so long. A cleaner, healthier home is just a few steps away, and your windows will thank you for it.