

Dirty window screens are one of those things you notice once and then cannot stop noticing. Suddenly every room feels a little darker, a little dustier, and a lot more frustrating. The good news? You do not need to haul every screen off its track and turn your afternoon into a major project.
Learning how to clean window screens without removing them is actually much easier than most people think, and it can save you a ton of time. Whether your screens are covered in pollen, dust, or that mysterious grey grime that seems to appear out of nowhere, there are simple methods that get the job done right where the screens hang.
In this guide, we are going to walk you through everything you need to know, from the basic supplies to grab beforehand to the step-by-step cleaning process anyone can follow. No special equipment, no complicated techniques, and no need to worry about bending or damaging your screens during removal. By the end, your windows will be looking cleaner and brighter with minimal effort on your part.
What You’ll Need Before You Start
Before you grab a cloth and start scrubbing, taking five minutes to gather the right supplies will save your screens from unnecessary damage and make the whole process much easier. Think of it like prepping your ingredients before cooking; having everything within arm’s reach means fewer interruptions and better results.
Your Core Cleaning Toolkit
Here’s what you’ll want to have ready before you touch a single screen:
- Soft-bristle brush (an old paintbrush or dedicated screen brush works great)
- Vacuum with a brush attachment for the initial dry pass
- Lint roller for quick, light-dust removal
- Microfiber cloths to wipe frames and soak up moisture
- Spray bottle filled with warm water and 2 to 3 drops of mild dish soap
Know Your Screen Material First
Not all screens are created equal. Standard fiberglass bug screens, aluminum bug screens, and solar screen mesh each react differently to tools and cleaning solutions. Solar screens carry a UV-blocking coating that harsh chemicals or rough scrubbing can degrade over time. Identifying your screen type before you start helps you choose the gentlest effective method. If you’re unsure what type you have, this helpful video walkthrough covers the differences visually.
Safety and Setup Tips
If you’re working on an upper-floor window, keep both feet firmly on the ground or use a stable step stool for low sills. Never lean out of a window to reach a screen in place; it is simply not worth the risk.
Before any wet cleaning begins, lay an old towel or drop cloth along the interior sill to catch drips and dislodged debris. A few optional extras worth adding to your kit include a handheld cordless vacuum for tight frame corners, a rubber squeegee for solar mesh screens, and painter’s tape to protect window frames during the damp-cleaning phase.
How to Clean Standard Bug Screens In Place
Now that your supplies are ready, it’s time to get to work. Follow these five steps in order, and you’ll have noticeably cleaner screens without ever touching a screwdriver.
Step 1: Dry Removal First
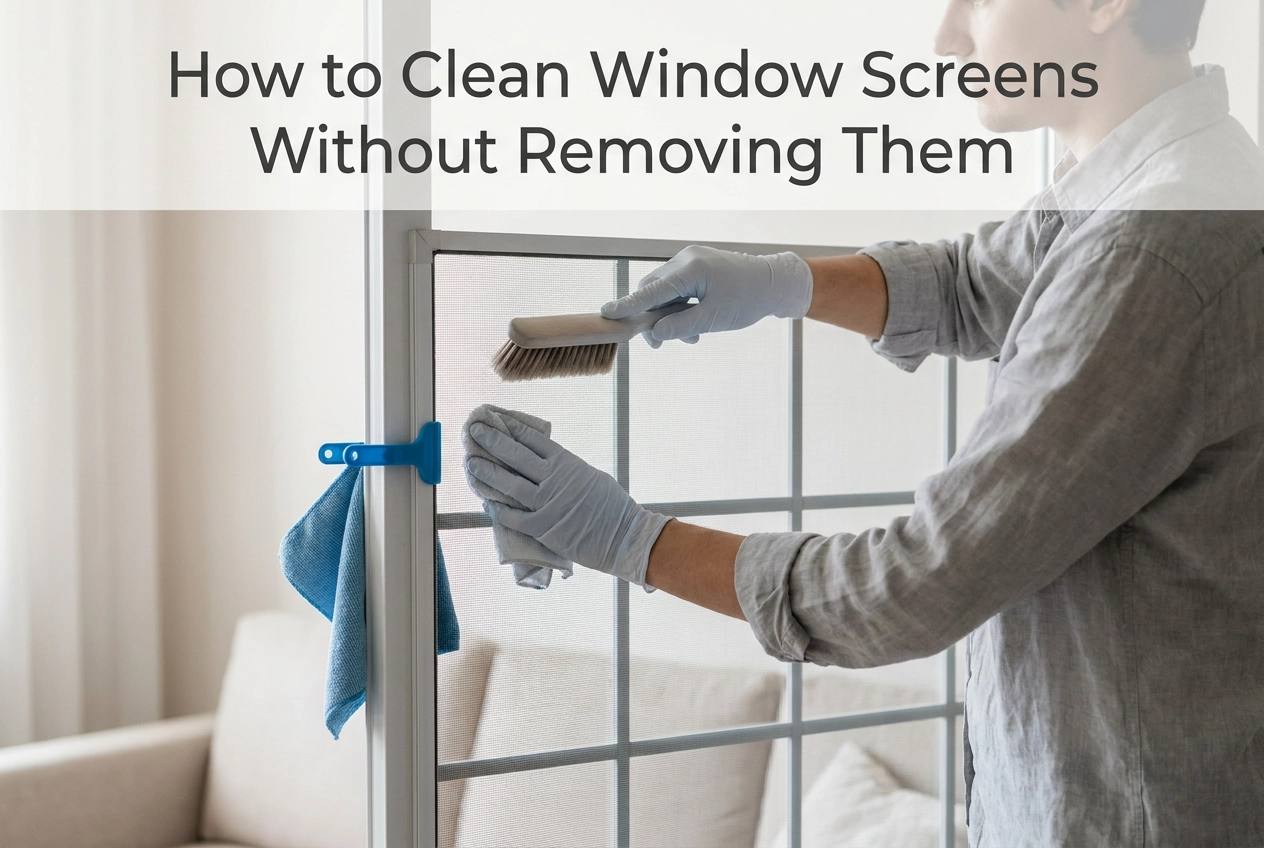
Start completely dry. Use a soft-bristle brush or your vacuum’s brush attachment to sweep across the mesh in slow, gentle strokes, working from top to bottom. This loosens and lifts dust, pollen, and debris before any water gets involved. Skipping this step is the most common beginner mistake; if you go straight to a wet cloth, all that dry buildup turns into a muddy paste that pushes deeper into the mesh weave and is much harder to remove. Give the entire screen surface a thorough pass, paying extra attention to the corners and frame edges where debris tends to collect.
Step 2: Lint Roller Pass
Once the brush has done its job, run a lint roller across the screen in slow, overlapping strokes. This picks up the fine particles the brush loosened but didn’t fully lift, and it works especially well for pet hair and pollen. It sounds simple, but this second dry step makes a real difference in how clean your final result looks.
Step 3: Damp Cloth Wipe-Down
Dip a microfiber cloth into your mild dish soap solution, wring it out well so it’s damp rather than wet, and wipe in gentle circular motions from top to bottom. The goal is light, consistent contact. Avoid pressing hard or scrubbing aggressively; fiberglass mesh can stretch or bow if you push against it with too much force. Martha Stewart’s guide to cleaning screens without removing them confirms this gentle approach works well even from inside the home.
Step 4: Rinse with a Clean Damp Cloth
Immediately follow up with a second microfiber cloth dampened with plain water. Wipe the mesh the same way to remove any soap residue. This step gets skipped often, but leftover soap acts like a dust magnet and will cause your screens to get dirty again faster than they should.
Step 5: Air Dry Fully
Leave the window open so airflow can dry the mesh completely before you close it. A screen that stays damp against a closed window can lead to mildew building up along the frame over time, which creates a whole separate problem. For most screens, full drying takes about 20 to 30 minutes on a mild day.
How to Clean Solar Screens Without Removing Them
If you have solar screens on your windows, the standard bug screen cleaning routine does not quite apply. Solar screen mesh is noticeably denser than regular insect screen weave, which means it traps fine dust, pollen, and airborne particles far more aggressively. On top of that, the mesh carries a UV-blocking coating that does the actual work of reducing heat and glare in your home. That coating is more delicate than it looks, and abrasive tools, harsh chemicals, or high-pressure water can break it down over time. Properly maintained solar screens can reduce solar heat gain significantly, so protecting that coating is worth the extra care. Think of cleaning your solar screens as maintenance for a functional surface, not just a cosmetic one.
What to Skip and What to Use Instead
Skip the lint roller entirely on solar screens. The adhesive surface can snag the tighter weave of solar mesh and cause tiny micro-tears that are invisible at first but gradually compromise the screen’s integrity. Instead, start with a soft-bristle brush or a single low-suction pass with a vacuum brush attachment to lift loose dust before introducing any moisture. This dry step matters more with solar mesh than with standard screens because the denser weave holds debris deeper.
Mixing Your Cleaning Solution
Keep your soap solution as mild as possible. One small drop of dish soap in a full spray bottle of warm water is genuinely all you need. Avoid anything containing bleach, ammonia, or citrus-based solvents; these ingredients can degrade the UV-blocking coating over repeated use, gradually reducing the screen’s effectiveness. Purpose-built screen cleaners are also a solid option if you want to skip the DIY mix altogether.
Wiping Technique
Lightly mist the screen with your solution, then wipe using a rubber squeegee blade (the same style used on car windows) or a soft damp microfiber cloth. Always work in downward strokes rather than circular motions. Circular scrubbing pushes debris deeper into the dense mesh instead of clearing it out. Downward strokes guide grime toward the bottom of the frame where it can be wiped away cleanly. Avoid dry terry cloth or paper towels, as both can leave lint trapped in the mesh.
Check the Coating After You Clean
Once the screen dries, take a close look at the surface. If you notice chalky residue, discoloration, or patches that appear lighter or more see-through than the surrounding mesh, that is likely UV coating wear rather than leftover dirt. No amount of cleaning will fix that. Screens showing those signs, especially those older than 10 to 15 years, are worth having professionally assessed to determine whether a rescreen makes more sense than continuing to clean a degraded surface.
Cleaning Screen Doors Without Taking Them Off the Track
Screen doors get the same daily punishment as window screens, but they also deal with foot traffic, pets, and ground-level dirt that window screens simply never see. The good news is that you can clean most screen doors thoroughly without ever lifting them off their track or hinges.
Sliding Screen Doors
Start by locking or securing the sliding door in the closed position so it stays put while you work. A door that can shift mid-clean may jump its track, especially if the rollers are worn. Before you touch the screen mesh itself, run a vacuum brush attachment along the top and bottom track channels. Compacted debris in those channels is one of the most overlooked sources of screen-level grime, since dirt from the track gets transferred to the mesh every time the door slides.
Hinged Screen Doors
Prop the hinged door open to a 90-degree angle and wedge a doorstop at the base before you start. Wind movement during cleaning is a real problem; even a light breeze can bow the mesh and make your wipe-downs less effective. A stable, taut screen is much easier to clean evenly.
Cleaning the Door and Checking for Damage
Follow the same dry-first, damp-second method covered in the bug screen section, but slow down around the door frame corners and spline edges. Those spots collect grime that routine cleaning almost always misses. Pay special attention to the door sweep and bottom rail too, since ground-level debris builds up there fastest and is a common starting point for frame corrosion.
If you notice the mesh pulling away from the spline groove while you clean, stop. That is a sign the door needs rescreening, not just a wipe-down. Continuing to clean a screen in that condition can make the separation worse.
After Cleaning: Lubricate the Track
Once the door and track are fully dry, apply a silicone-based lubricant to the track to restore smooth glide. Avoid WD-40 here; it is petroleum-based and attracts dust quickly, which undoes your cleaning work fast. A dedicated silicone spray keeps the track slick without pulling in new debris, and it helps prevent the screen from jumping off-track during normal use.
Choosing the Right Tools for Your Screen Material
Not all window screens are built the same, and using the wrong tool on the wrong material is one of the fastest ways to cause damage you didn’t intend. Before you clean, it helps to know what you’re working with.
Fiberglass bug screen is the most common type in residential homes and the most forgiving to clean. The woven mesh handles soft-bristle brushes, lint rollers, microfiber cloths, and mild soap solutions without complaint. What you want to avoid are stiff-bristle brushes and abrasive scrub pads. Those rough surfaces can snag the fibers and cause fraying that no amount of cleaning will fix.
Aluminum bug screen is a step up in rigidity, but it comes with its own quirks. It responds well to a vacuum with a brush attachment and gentle damp cloth wipe-downs. The key word there is gentle. Press too hard and you can dent or crease the mesh permanently. Also be careful not to bend the frame while you’re working, since aluminum frames do not bounce back once they’re deformed.
Solar screen mesh needs the softest touch of all three. Stick to a soft brush, a low-suction vacuum, a rubber squeegee, and a highly diluted soap solution. Skip the lint rollers, abrasive tools, and any chemical cleaners entirely. The dense weave is more vulnerable than it looks.
A quick rule of thumb: a soft brush and vacuum are safe for all three types. Lint rollers are fiberglass only. A rubber squeegee is your best friend on solar mesh. And pressure washers are off the table for all three, since the force can dislodge splines and bow your frames out of shape.
Not sure what material you have? Look at the mesh. Standard fiberglass is usually grey or charcoal with a visible open weave. Aluminum has a subtle metallic sheen and feels stiffer to the touch. Solar mesh looks noticeably darker and denser, and it blocks a significant amount of light coming through from outside. If you’re still unsure, a local screen specialist can identify your material quickly during a service visit.
How Often Should You Clean Window Screens?
Most home improvement experts and professional cleaning services recommend cleaning window screens at least twice a year as a solid baseline. The two best windows are early spring, before peak allergy season kicks in, and early fall, after a summer’s worth of dust and debris has settled into the mesh. If your home sits in a high-pollen area or near a busy road, bumping that up to quarterly in-place cleanings will keep airflow strong and prevent buildup from hardening onto the surface.
Solar screens deserve more frequent attention than standard bug screens. Their denser weave traps fine particulate matter faster, and in sun-heavy climates, pollen and dust can literally bake onto the mesh if you let it sit too long between cleanings. Once that happens, gentle wiping won’t cut it anymore, and you risk damaging the UV coating trying to force it off. A good rule of thumb is to give solar screens a light dry brushing once a month during heavy pollen or dust seasons, with a damp cleaning every eight to ten weeks.
Climate plays a big role in how quickly your screens get dirty. Homes near construction zones, in high-wind corridors, or in arid regions with seasonal dust events may need a quick brush-down every few weeks just to stay ahead of buildup. Skipping those quick passes in UV-intense environments can also accelerate the breakdown of mesh coatings over time.
In-place cleaning handles routine grime well, but it has limits. If your screens have not had a professional cleaning or inspection in over two years, or if damp cleaning keeps leaving persistent staining behind, it is worth scheduling a professional visit. Services that offer same-week rescreening and screen cleaning can resolve those issues fast before the next season hits.
Finally, treat every cleaning session as a quick diagnostic. While you are wiping down the mesh, check for fraying edges, loose splines, bent frames, and any small holes. Catching a loose spline early is a simple fix; ignoring it usually turns into a full replacement.
When DIY Cleaning Is Not Enough
Sometimes a cleaning session reveals something more serious than dust. If you notice any of the following during your wipe-down, stop cleaning and take a closer look before continuing.
Visible mesh damage is the clearest stop signal. Small holes, fraying edges, or sections where the mesh has pulled away from the spline mean the screen needs repair or rescreening, not another pass with a damp cloth. Continuing to scrub or push moisture into a compromised mesh can widen existing tears and accelerate the separation between the mesh and the frame. At that point, you are not cleaning a screen; you are slowly destroying it.
Stubborn staining is another sign that DIY has hit its ceiling. Hard water deposits leave white mineral scale that clings to mesh fibers. Aluminum frames develop a chalky oxidation layer over time. Solar screens are especially vulnerable here because pollen and fine debris can bake onto the dark mesh coating during prolonged sun exposure, creating an amber crust that gentle wiping simply will not lift. Pushing harder or switching to stronger chemicals risks damaging the UV coating that makes solar screens effective in the first place.
Fixed-frame installations and upper-floor windows add a safety layer to this equation. Some screens genuinely cannot be removed without professional tools or equipment. Attempting to force a fixed frame out, or leaning out of a second-story window to scrub a screen, creates real risk for a homeowner. Professional screen technicians have the access methods to handle these situations safely.
Frame damage is the final category worth flagging. A warped frame or bent corner cannot be fixed with cleaning. A frame that gaps at the edges lets insects in and reduces the solar screening benefit you paid for.
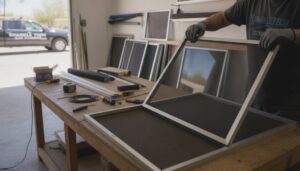
If your cleaning session uncovered any of these issues, that is the right moment to call in professional help rather than waiting until next season. Sparkletech offers same-week rescreening, repair, and screen cleaning services for bug screens, solar screens, and screen doors, so you are not left managing a damaged screen through months of open-window weather.
Keep Your Screens Clean Without the Hassle
The method really is straightforward once you have it down: dry brush or vacuum first, then work through with a damp cloth and mild soap, then rinse and air dry. That sequence handles the job for bug screens, solar screens, and screen doors when you follow it consistently. The one thing worth repeating is that solar screens deserve gentler tools and more frequent attention than standard insect screens. The UV coating that makes them effective at blocking heat is also the first thing an abrasive pad or stiff brush will strip away, and a damaged coating shortens the screen’s useful life considerably.
There is also real value in treating each cleaning session as a quick inspection. Running a cloth across the mesh puts you close enough to spot small tears, a sagging frame, or stubborn buildup that mild soap simply will not shift. Catching those issues early almost always costs less than a full replacement later.
If your cleaning session does turn up damage or grime that will not budge, Sparkletech offers same-week rescreening, repair, and professional cleaning for bug screens, solar screens, and screen doors. Sometimes a fresh screen is the easier fix.
Conclusion
Cleaning your window screens does not have to mean a full afternoon of frustration and hard work. With the right supplies, a simple technique, and a little patience, you can get noticeably cleaner screens without ever pulling them from the tracks. The key takeaways are simple: work gently to avoid damage, use mild cleaning solutions, tackle screens from top to bottom, and let everything dry fully before closing your windows.
The payoff is real. Cleaner screens mean more natural light, fresher airflow, and a home that simply feels better to be in.
Now it is your turn. Pick a sunny morning, grab a soft brush and some soapy water, and work through your windows one by one. You will be amazed at the difference a single hour can make. Your future self will thank you for it.